Friday, April 25, 2014

The Preschool Starter

My daughter has fantastic preschool teachers.   I mentioned that I was teaching a course on bread and that the kids might enjoy having their own bread starter to make pancakes.  It's very exciting that she agreed to do this project with the kids!  I even showed her my starter on the day it went on a field trip to Noisette.  We talked about how the starter just grows from the wild yeasts and bacteria in the air and had a good laugh about what might be in the air in a classroom at the beginning of spring when everyone is a little sick.  But I promised her it wouldn't mold because the combination of wild yeasts and bacteria would prevent any unwanted fungi or bacteria from growing.

Yesterday morning when we arrived, my daughter's teacher looked very worried.  She showed me the bowl.  Yes, a little crusty that's ok...oh but wait...do you see it?  Mold!


I sort of like molds which belong to the fungal phylum Zygomycota.  Zygomycetes are ubiquitous worldwide and tend to prefer nutrition the form of simple sugars readily available in the bread starter.  Zygomycetes can reproduce sexually or sexually and once a spore lands somewhere if the conditions are right it does not take long to get a whole colony.  In this case just 3 days during the fermentation.


While studying the genetic diversity of saprotrophic fungi on decomposing woody conifer roots for my graduate work, I spent a lot of time collecting, culturing, identifying, amplifying, and sequencing zygomycetes from Oregon forests.   While I think that Rhizopus (common bread molds) are particularly beautiful under the microscope, I'm not really a fan of them to eat in this context especially since we did not identify these particular fungi.

Stirring the mixture, the starter underneath looked bubbly and normal.  However, I suggested that she throw it out, start over, put the jar on the warm dishwasher in the kitchen and offered to bring the jar home over the weekend for its first feedings.  I also posed a question to on the New York Times discussion about bread and passed along the advice to mix up the starter several times a day.


Second try: they managed to keep the mold at bay!   We were responsible for bringing the starter home tonight and feeding it this weekend.


So now we have three starters at home.  That feels like a lot of responsibility.  This image I found on the #Bread101 hashtag my students are using totally sums it up.


Thursday, April 24, 2014

Day 25 Bread Experiment update and The Long Winter

Well we tried each of the breads in class today.  Baking fail!  

None of the loaves are something that I would want to sit down and eat.  We did a poll of the students and each of the breads except barley was voted by at least two people as their favorite sample.  Even though they didn't turn out well as something to eat, one can really taste the different flours and the ways that the flours interact differently with the sourdough starter.  Same starter, same conditions, but the tastes are totally different. This is fascinating.  


Today in our class we also talked about different types of wheat and passed around some samples of wheat berries from Camas Country Mill. Students had a chance to be explore the Calorie count and nutritional analysis of various wheat varieties.  I was surprised by how many Calories there are in a cup of wheat flour.

Our bread experience got me thinking about the book The Long Winter by Laura Ingalls Wilder where the family experience a record setting cold winter in the late 1800s and the family had nothing but wheat berries that they ground into a bread for weeks on end.  As a food product goes, they were able to get a lot of Calories from the bread so they could survive months when the trains couldn't get through to their new frontier town of De Smet, South Dakota. Writer Aimee Levitt reflects on the book in a piece from earlier this year in the midst of the cold Chicago winter. 

Our breads were so hard, dense and not pleasant to eat, and we even had the benefit of a warm kitchen where we could do our work.  We were not also twisting hay to just keep a fire burning, grinding a coffee grinder all day to have enough flour for the meal, or eating seed wheat from our neighbor.  I cannot imagine the perseverance of the Ingalls family to eke out their survival during this terrible winter.  Wendy McClure and Courtney Crowder used a period recipe and coffee grinder to try out a "Long Winter" bread.  It looks very brick-like much as our breads did today.

I am surprised that this version of the bread includes a sourdough starter.  What would they have fed it to keep the starter alive? And at some point the Ingalls family must have run out of bacon drippings, salt, and soda.  What did they do then?  I also really wonder if our version of bread that we baked yesterday is really any better (or worse) than the "Long Winter" bread.  It would provide us with sustenance, but certainly would not be considered comfort food like so many other breads.

Wednesday, April 23, 2014

Day 24 Bread Baking Flour Experiment

What an amazing bread adventure today!  My colleagues and I decided to try baking one bread recipe with six different types of wheat all grown locally and milled at Camas Country Mill.  We have asked our students to design and test an experiment with their starters and collect some data about how the starter reacted to varying conditions.  The faculty decided that we too should experiment with how different flours influence the final product of a loaf of bread.  All other variable were as much the same as we could make them. Along the day of baking we observed differences in moisture content, bubbles, rising, texture, feel, and smell. Tomorrow we will taste the breads as well.

To get ready, I planned to grow up my starter so we had enough to use for all of the loaves.  However, I was concerned that even though the starter had a nice smell and my baking projects were going well, that it would not be active enough to support this much bread baking.

Fortunately last week, we took our students on a great field trip to Noisette Pastry Kitchen where we got a fantastic insider perspective on artisan baking, smelled the bakery mother starters, and tasted several types of bread.


My starter came along on the field trip and afterwards exploded in activity. Two days after our field trip and large feedings (since I learned I was likely underfeeding my starter) it even completely filled a half gallon mason jar.  I saved out a large portion of this very active starter and put it in the refrigerator to prepare for the big baking day.


For the baking day, we prepared six sponges with six different types of flour.  Front to back: Red Fife Wheat, Barley, Hard Red Wheat, Artisan Blend (60% Hard Red, 30% Red Fife, 10% Rye), Emmer, and Rye. The texture after 12 hours of fermentation ranged from wet, to fluffy, to dry.


We were impressed as we started to knead the dough in preparation for the first rise how different the textures were.  The Red Fife was great to work with; it was soft and pliable and quickly formed a ball.


The Emmer was also very soft a pliable and easy to work with; it had a very airy and silky texture.


The artisan blend and the hard red wheat (very similar in composition) took a much longer time to knead but managed to change texture after a longer kneading into a workable dough.


The barley was like playdough.  It was hard to work with and took very little flour.


After rising for 2 hours and 30 minutes (and all getting some work done!), we punched down the dough and shaped them into relatively equivalent loaf pans.  The hard red wheat was very solid when "punched;" it even made an amazing "thunk" noise.

Left to Right: Red Fife Wheat, Barley, Hard Red Wheat, Artisan Blend, Emmer, and Rye.  They all had more spring to the dough (even the lump of barley) than before the first rise.  We were especially impressed by the feel of the Red Fife, Emmer, and Rye that were particularly airy to touch and were nice and easy doughs to work with.


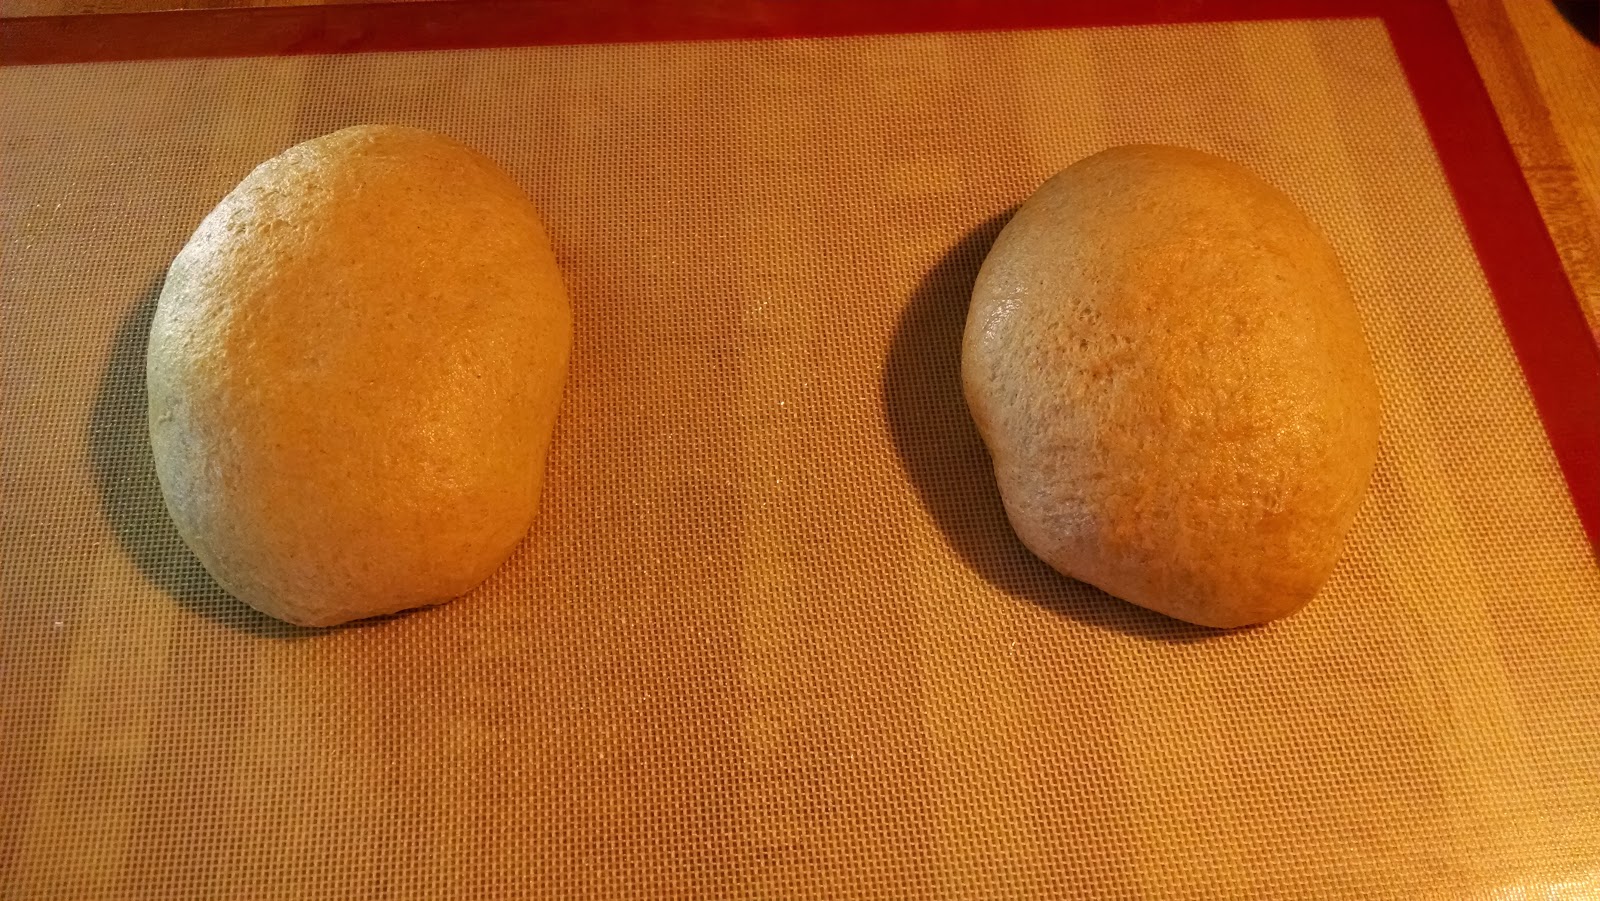
After proofing for nearly 90 minutes, all of the loaves had risen to varying degrees.  While we thought that some of the loaves could use a longer proofing time, time commitments didn't allow us to have the luxury to spend more hours watching the dough rise.


So we baked them.  Six loaves baking at once!  The smell is fantastic.


Last five minutes they were out of the pan.
Top Left to Right: Hard Red Winter, Barley, Red Fife
Bottom Left to Right: Artisan Blend, Emmer, and Rye.


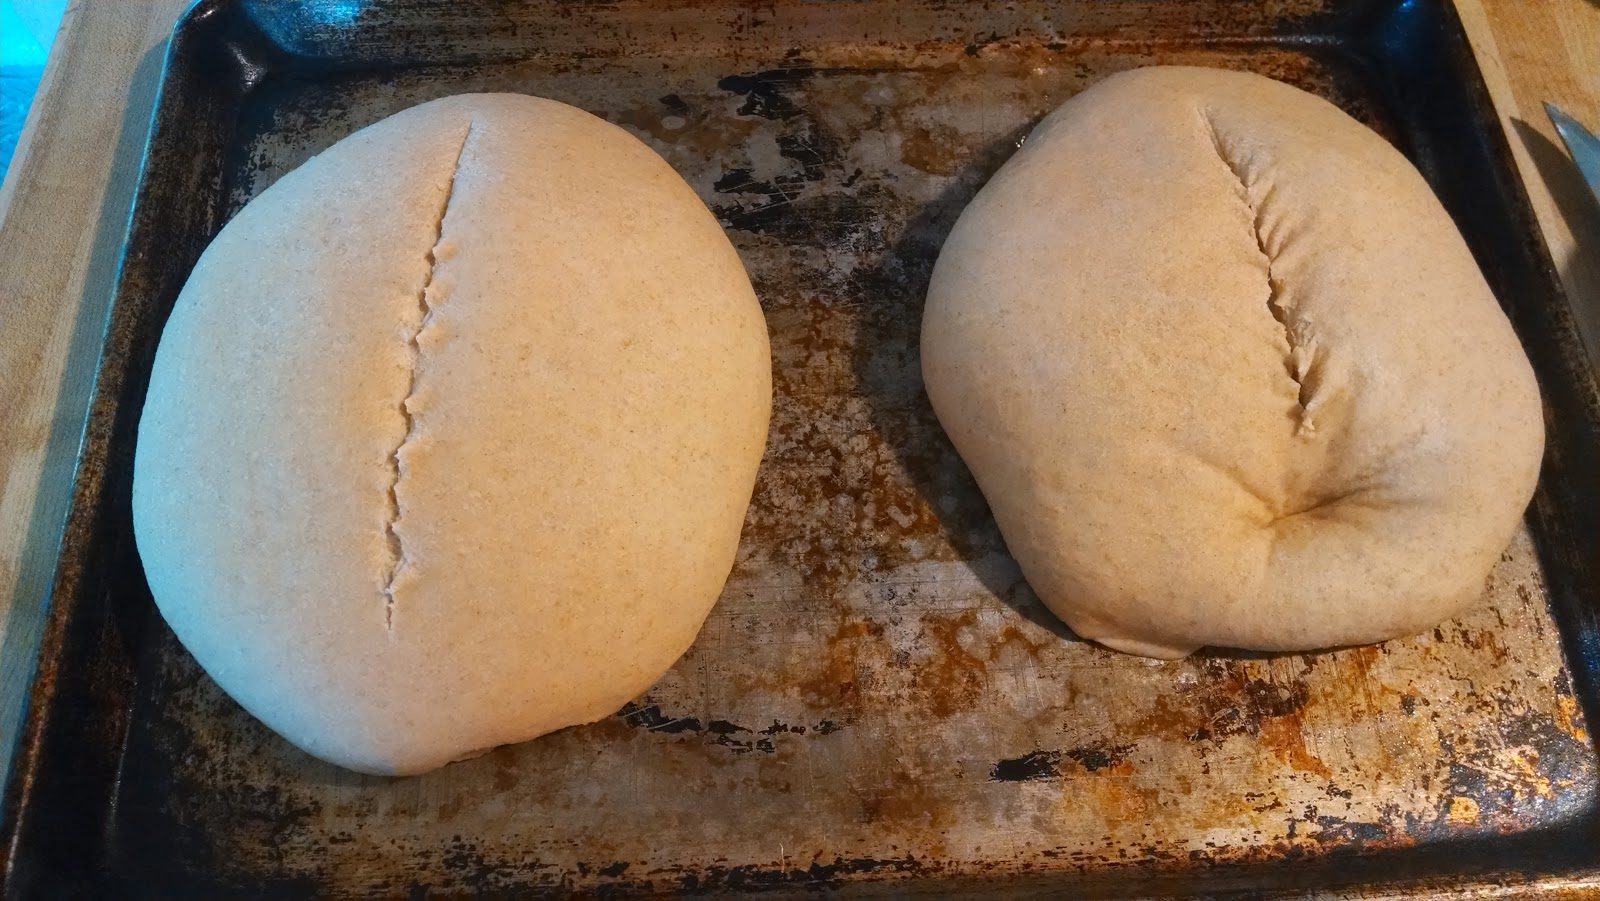
Every loaf was a beautiful golden brown when removed from the oven and had that great "thumping" sound of bread.  Based on the way our loaves have cracked, we read sources that not surprisingly indicated that we probably did not give the loaves a long enough second proofing in the pan.


They look so different even baked under the same conditions.


The smells are surprisingly varied as well with distinct differences for each of the different flours. On the extremes, the rye is very earthy and the barley very sweet. The other four had more traditional wheat bread flour smells.


Tomorrow we will have an opportunity to taste these breads in comparison with one another.  It seems rather appropriate that we had our great bread adventure on the same day that the New York Times published a whole section on Bread.  Bread is such a stable of life for many people, and it's easy to overlook that when just making a quick peanut butter and jelly sandwich or a piece of toast.  However, now that we've started exploring the intricacies of biology, physics, history and culture, I am beginning to see how this "simple" food is really amazingly complex.    


Wednesday, April 16, 2014

Day 17 Whole Wheat Sourdough French Bread

My colleagues are all continuing to grow and maintain their own starters in parallel with our students. In her most recent blog post Jennifer describes making a batch of pancakes with maple syrup in the recipe.  I'd never thought about doing this--what a great idea! Karen's starter went on a field trip to Noisette Pastry Kitchen to collect some wild yeast and seems to be doing well.  We will take our students on a field trip to the same bakery tomorrow, and I plan to bring my starter along too to see if I can also collect some additional wild yeast.  It will be interesting to compare smells and appearances with other students and faculty.

In addition to field trips, the students in the course also have an opportunity to read and explore literature on bread from a wide variety of angles from readings that include very technical scientific writing such as an article about microbiota from De Vuyst et al. (2009) to excerpts from a poem about terroir written by Gary Paul Nabhan (2008).  In class we delve deeper into these topics with a variety of student engagements.  Our course is a collaboration between the Clark Honors College and faculty who are affiliated with the Science Literacy Program and Food Studies Program in the College of Arts and Sciences at the University of Oregon.  It is very exciting to have the opportunity to teach with this diverse and inspiring group of faculty and students where we are incorporating student-centered learning with an interdisciplinary perspective to the study bread.

Not only are the students growing a starter, but they are currently engaged in scientific experiments with their starters.  I'm looking forward to learning more about what experiments they're running and the results.  It's a great opportunopportunity for non-science majors to engage in a real kitchen science experiment with something that they will encounter in their everyday lives--bread.

Not only are we asking our students to experiment with their starter, they have the task of keeping it alive until the end of the term so that they can bake a loaf of bread with a group as their final course assignment.  We are looking for an easy to understand bread recipe that will work with sourdough and whole wheat bread.  There are several sourdough bread recipes like the one I baked last weekend that also include packaged yeast.  However, we'd like to try and find one that doesn't require the extra yeast.

I thought I'd try out a promising recipe from the Sunset Cook Book of Breads (1977) edited by Susan Warton and Kandace Esplund Reeves.  There's a whole section with sourdough bread recipes.  I'm looking forward to trying a few others as well. This bread recipe is adapted from a classic sourdough french bread recipe (pg 52).  The original recipe calls for double the amounts listed here to create two loaves and a sponge feeding time of 6-8 hours at 85 degrees F.  Mine sat on the counter at 67 degrees F for 10 hours instead.

Whole Wheat Sourdough French Bread

1/2 c sourdough starter at room temperature
1 c warm water
2 c soft white flour (from Lonesome Whistle Farm)
Mix ingredients together in a large bowl, cover with a cloth, and let it stand until bubbly.

1 t salt
1 t sugar
1 1/2 c Red Fife Wheat Flour (from Lonesome Whistle Farm) + 1/2 c for kneading
Mix to sponge and then turn out onto board to knead 10 minutes until smooth.


Put dough into a oiled bowl, cover and let stand for 2 1/2 hours.  I put the bowl into the oven with the temperature turned to 250 for 1 minute and then turned the heat off and left the oven light on.


I'm glad that I have photographic evidence that the dough did rise.  It was hard to tell, but the dough did have a much more airy texture after the first rise.


Whoops, I forgot to knead the dough a second time and just went to rolling it into an oblong shape. Seems forgiving though. Place dough on a baking sheet, cover again with a cloth and return it to a warm place to rise again for 60-90 minutes.  The instructions state to wait for it to be puffy and almost doubled--and there's complicated instructions about transferring to a piece of cardboard covered with cornmeal that I ignored.


After the next rise is finished. Put the oven racks in the lowest two places and preheat oven to 400F. Just before baking put a baking sheet into the lowest rack and pour in 1/4 inch of boiling water.

Heat cornstarch and water to boiling.  Cut three 1/2 inch slashes in the loaf of bread. Brush top and sides with cornstarch and water mixture.


Whoops.  I forgot to check the temperature of the oven before doing the last step!  50 more degrees to go before I can bake my bread. Put dough into the oven on the shelf.


Bake 400F for 10 min.  Brush evenly with cornstarch mixture again.  It smells like bread, and made the most amazing sizzling sound when I brushed it with the cornstarch mixture.


Bake 20-25 minutes until loaf is golden brown and sounds hollow when tapped.


That is one sturdy loaf of bread!  The outside is crusty; the inside is soft. Both textures are delightful to eat.  It has a spectacular tangy sourdough flavor.  I'm rather in awe that my jar of sourdough on the counter has this taste!  It's a little dense, but not horrible right out of the oven.  I'll let it cool overnight and see how it tastes and cuts in the morning.

Total time start to finish after the sponge was ready 4 1/2 hours.

Sunday, April 13, 2014

Day 13 Sourdough Blueberry Muffins and Chicken Noodle Soup

There's a cold making its way through our family.  Today I fought back with one of my favorite childhood Sunday dinners of chicken noodle soup and sourdough blueberry muffins.  Even if dinner doesn't actually fight off the virus, it certainly provided some comfort food to everyone.

I'm really enjoying using all of these sourdough recipes.  I'm especially excited that the starter that I began less than two weeks ago can be used to duplicate recipes that I've enjoyed at other points in my life.  We've asked our Bread 101 students to create a personal timeline around bread, and I think mine would have to include a 2014 label for realizing just how important sourdough starter has been throughout my life.  Fascinating!

Sourdough Blueberry Muffins
1 1/2 c Red Fife flour (Lonesome Whistle Farm)
1/2 c rye flour (Lonesome Whistle Farm)
1/2 c milk
1/2 t cinnamon
1 egg
1/4 c oil
1/4 c applesauce (our tree)
1/2 c sugar
3/4 t baking soda
1 c blueberries (Thistledown Farm)
3/4 c sourdough starter

Mix ingredients together in the order listed.  Mix until just moist but do not beat batter.  Put into well-oiled muffin tins or muffin baking paper.  Bake 25-30 minutes 375F.


Chicken Soup with Egg Noodles
1 egg
1/8 t salt
use small egg shell to get water to mix with egg.  Beat well.

3/4 c Red Fife flour (Lonesome Whistle Farm)
Add in flour until mixture makes a sticky ball.  Let dough stand 15 minutes.  Roll dough until very thin and then cut into desired shape.  I roll it over and cut diagonally to make V-shaped noodles.

Heat soup stock (today stock from a chicken that was first roasted with lemon, garlic and spices from Fair Valley Farm) and bring to a boil.  Add in noodles and boil until they float.  Add in cooked chicken pieces and carrots (and other vegetables if desired). The prescription for my family: eat a warm dinner, go to bed early, and enjoy leftovers for the rest of the week.

Friday, April 11, 2014

Day 11 and Amy's Sourdough Bread

All week I've been feeding and watching my starter.  As Chad Robertson describes, it seems to have daily cycles, and when I drop a bit into water it rises.  This means my leaven is ready! I'm not ready to tackle the Oat Porridge recipe that Chad Robertson describes, but thought I'd try a Sourdough Bread recipe from my mom.  On the first day of our Bread 101 class, I was thinking about this recipe as part of my early memories of bread.  In the past, we've always made it with white flour, and my mom says that she put this recipe together from a couple of others to create a taste and a loaf size that was just right for our family.  The instructors are pretty sparse so I had to fill in some details from other bread recipes and experiences. I was also admittedly impatient and didn't wait the recommended 6-8 hours for the sponge--but I have been feeding it for 11 days!

Heavenly.  Totally worth the wait for 11 days and 6 hours of time today to make this bread!

The bread held together very nicely, was easy to cut, and tastes great.  There is a hint of sour from the starter, but the yeast taste is more powerful.  I am looking forward to thinking about how to my next bread without the addition of packaged yeast and see how it compares.

Amy's Sourdough Bread
1/2 c sourdough starter
1 c water
1/2 c milk
2 c flour (50/50 white/wheat from Bob's Red Mill)
Combine to make sponge and set aside for 3 hours.


1 package yeast
1/4 c warm water
1/2 t honey (from Bebee Lane Honey)
Mix and let stand 15 minutes.

2 T honey
2 t salt
1/4 c oil
2 c flour (50/50 white/wheat)
Combine these ingredients with yeast mixture and sponge.  Mix in as much flour as possible before kneading by hand.

1 1/2 c flour (50/50 white/wheat)
Turn out onto board and knead for 15-20 minutes adding in as much remaining flour as possible.  Put into an oiled bowl, cover and let rise until double (1 hour and 15 minutes today).


Divide into two pieces and shape into round loaves.  


Put on baking tray and cover with a cloth for second rise (1 hour and 30 minutes today and the cat only stepped on one loaf!)


Bake at 350F for 30-35 minutes.  Remove from the oven and let it cool before eating.