Saturday, December 31, 2011

Mushroom Bisque Soup


A shitake mushroom block that I purchased at the 2010 Mt. Pisgah Mushroom Festival from Rain Forest Mushroom Company has sat in the bottom of my refrigerator for the past 14 months. I had already grown the oyster mushroom block, but just hadn't found the perfect time for the shitake block. Last week when I checked on it, the mushrooms were already starting to sprout! So I set up the mushroom block in an old fish tank, and in less than a week we had a full crop of mushrooms. My son thought it was great fun to harvest the mushrooms.


I have two favorite mushroom soup recipes in the Moosewood Cookbook. One is a Hungarian Mushroom Soup and the other Mushroom Bisque soup. Today was a Mushroom Bisque soup day! This the first time that I have made this recipe with anything other than button mushrooms. And I normally use plain old milk, but today used up some half-and-half in the refrigerator. We served ours with additional garlic toast for mopping up the soup and Ninkasi Sleigh'r Ale. Yum.

Mushroom Bisque Soup
2 fist sized potatoes chopped (from CSA)
1 1/2 c water
1 onion chopped (from CSA)
2 T olive oil
several cups of mushrooms chopped (grown at home)
1 t salt
2 cloves garlic (from CSA)
1/4 t thyme
3 T dry white wine
2 T soy sauce
fresh black pepper
1 1/2 c half and half (milk is fine too)
homemade croutons
green onions chopped(from CSA)
spinach chopped (from CSA)

Place chopped potatoes in a pan of water and boil until potatoes are soft.

Saute onions in olive oil until soft. Add in mushrooms and salt and cover until mushrooms are cooked through. Add in garlic and thyme. When soft, drain water from potatoes and add to mushroom mixture. Stir in wine, soy sauce, pepper, and half and half. Reserve part of soup mixture. Blend the rest of the soup with a hand blender or food processor), and then mix again with chunky soup.


Serve with garnish of croutons, green onions, and spinach.

Croutons and Spinach
1 slice of bread per person cut into croutons sized pieces
Garlic
Olive oil
Butter
Spinach

Melt butter and add garlic. Add bread pieces and coat in butter/garlic mixture. Add olive oil and cook until browned. The croutons can be browned more in the oven (we didn't have time to do that and they were just as yummy).

After the croutons have cooked, add more olive oil and garlic and saute spinach until just wilted and bright green.
Happy New Year!

Thursday, December 29, 2011

Easy Winter Roasted Vegetables


Only recently have I discovered how wonderful winter roasted vegetables are to eat!

Winter Roasted Vegetables
Parsnips (from CSA)
Beets (from CSA)
Potatoes
Onion
Garlic (from CSA)
Sweet Potatos

Cut vegetables, coat with olive oil and a little salt. Bake 350 F for 45-60 minutes. Enjoy.

Monday, December 26, 2011

Butternut Squash Chowder


Today is a day for a warm winter soup. This is a slow cooker recipe adapted from Slow Cooker Revolution by America's Test Kitchen.

The original recipe calls for bacon; however, the last recipe that I made in my cast iron pan was Okonomiyaki and hadn't yet cleaned out the bacon grease, so I've just cooked the aromatics in the bacon grease and called it good. I also started with frozen chicken broth and added it frozen to the slow cooker. It took several hours even on high to completely defrost. The original recipe calls for heavy cream, but we have 2% milk at home instead.
Butternut Squash Chowder
1 onion minced
3 garlic cloves minced (from CSA)
1/2 t thyme
1/8 t nutmeg
1/3 c flour
4 c chicken broth
2 c water
3 lbs butternut squash, peeled, seeded, chopped into 1/2 inch pieces (from CSA)
2 bay leaves
1 T olive oil
salt and pepper
8 oz kale
1/2 c milk
1 T sage
1 t brown sugar
Parmesan cheese

Chop butternut squash.
Saute chopped onion, garlic, thyme and nutmeg in bacon grease until onions are translucent. Add 2 c water and whisk in 1/3 cup flour. Stir until thickened. Transfer mixture to the slow cooker. Add in chicken broth, bay leaves, and half of the chopped squash.

Put the other half of the squash into a foil packet and coat with oil, salt, and petter. Put foil packet on top of the soup.
Cook until squash is tender, 4-6 hours on low.

Remove foil packet. Add in chopped kale and cook on low 20-30 minutes. After kale is cooked, put squash from packet back into the soup. Stir in milk, sage, and brown sugar. Add salt, pepper, nutmeg, and cheese as desired.

Sunday, December 25, 2011

Christmas Blueberry Roll

Yum. This is one of my favorite family Christmas recipes. It never tastes quite as good as when my mom makes it (I know she doesn't use whole wheat flour and probably adds more blue berries), but the combination of gooey blueberries in sweet bread is just delicious. Everyone in our family has been snacking ALL day long!

Swedish Tea Ring

Dough
1 c scaled milk
1/2 c sugar
1 t salt
1/2 c margarine

Heat milk until just before it boils. Remove from the stove and put into mixer. Stir in sugar, salt, and margarine. Let mixture stand until lukewarm and the sugar and margarine has melted.

2 1/2 t yeast
1/4 c warm water
1 t sugar

Dissolve yeast in water and 1 t sugar. Let grow about 15 minutes until bubbly. Add to milk mixture.

1 egg beaten
4 cups unsifted flour (mixture of whole wheat and white)

Add to egg and 2 c flour to milk mixture. Beat until smooth. Add additional 2 cups of flour to make a stiff batter. Place in a lightly oiled bowl and cover tightly with plastic wrap. Cool in refrigerator for at least 2 hours of up to 2 days.

Filling
2 c blueberries (from McKenzie River Farm)
1/2 c brown sugar
1/2 c flour
1/2 c chopped nuts (Filberts from Thistledown Farm)
1 t cinnamon
3 T melted butter

Mix sugar, flour and cinnamon together. Add blueberries and nuts.

Roll our dough into a square. It can be made into 2 smaller rolls (rectangle 7"x14") or one larger roll. Smaller rolls are easier to handle.

Put melted butter on dough once rolled out. Spread filling over the dough.
Roll up and pinch the edge to seal.
Form into a ring on a greased baking sheet (stuff in more blueberries before sealing ends together) with the sealed edge down.
Cut 2/3 through the ring at 1 inch intervals.
Twist each section sideways.
Cover and let rise in a warm place until doubled (about 1 hour). Bake at 375F for 20-25 minutes.

Warm Christmas Salad

I needed a side dish for our Christmas dinner that would allow me to use many of the leafy green vegetables from our CSA this week. In my Moosewood Cookbook, I found and adapted this recipe for Warm Salad. I chopped all of the vegetables the night before and stored them in the refrigerator so all I had to do was cook everything together. This recipe made a huge amount of salad. It was enough for the eight adults at our dinner with plenty of left overs!

Warm Salad

1 bunch Swiss Chard chopped (from CSA)
1 bunch Sugarloaf (aka Castel Franc0 Chicory) chopped (from CSA)

8 cabbage leaves chopped--in this case one whole small cabbage (from CSA)

Olive oil
Salt and Pepper
3 leeks chopped (from CSA)
1 red onion chopped
3 cloves garlic minced (from CSA)
10 mushrooms sliced
1 stalk of celery chopped
3 T balsamic vinegar
1/2 c Parmesan Cheese


Heat oil in a large pan. Add in greens a little at a time and salt before adding more greens. Cook until the greens are wilted but still retain some of the color. Remove from the heat and place in serving dish. Add more oil to the pan and saute leeks, onion, garlic, mushrooms, and celery together until onions are soft. Add to the greens dish. Toss with balsamic vinegar and cheese. We served it warm, but the recipe instructions indicate that it can be served at any temperature.

Friday, December 23, 2011

Okonomiyaki

Several years ago, my husband and I spent a wonderful December vacation in Japan with our friend Ben. He took us to an okonomiyaki restaurant in his hometown where we cooked our own vegetable and meat filled pancakes on a griddle at our table. The resulting okonomiyaki were very flavorful, and it was great fun to sit around the table and make our giant pancake dinner. We haven't had okonomiyaki in the United States, but a friend of a friend posted this version online recently. I thought it would be nice to try since I still had cabbage left from an earlier CSA bag, and everyone in my family likes bacon.

They were very similar to the Cabbage Fritters that I have made in the past. While we enjoyed having bacon for dinner, I'm not sure what was missing, but these did not taste like the ones we had in Japan. I do like the idea of a cabbage fritter with more vegetables in the batter.


Okonomiyaki
3 eggs

1 1/2 c flour

1 c water

1/2 t salt

2 T freshly grated ginger
1/2 head cabbage shredded (from CSA)
1 onion (from CSA)

6 mushrooms sliced (or chopped and added to batter)
1/2 lb bacon strips cut in half

Beat eggs and stir in water, flour, salt and ginger. Add scallions and cabbage. Heat a stove top skillet or griddle. Cook one piece of bacon in the pan and remove. Scoop some batter and make a pancake. Place mushrooms and bacon on top of the uncooked pancake. Cook until the bottom of the pancake is browned (3-4 minutes). Flip and cook the second (aka bacon side) until the bacon is browned.

Tuesday, December 20, 2011

Mexican Wedding Cakes, Russian Tea Cakes, Snowballs


These crowd pleasing cookies are called Mexican Wedding Cakes, Russian Tea Cakes, and Snowballs in our family. My husband's mother included this recipe in a lovely book she made for us of family recipes. I wanted to use up a little rye flour that was in my freezer so tried to make these with rye flour rather than wheat flour. I liked the taste, which was a little "earthier." My four-year old proclaimed that they were delicious and ate many cookies!


Recipe
1/2 c butter
4 T powder sugar
1/2 c ground nuts--filberts (from Thistledown Farm)
1 t vanilla
1 c rye flour (from CSA)
Powdered sugar for top

Grind nuts in food processor. In mixer, beat butter until soft, add sugar and beat well. Mix in flour, nuts, and vanilla and beat well. Roll into small balls or scoop with melon baller and place on cookie sheet. Bake 325F for 10-12 minutes until lightly golden. Remove from pan and roll in powdered sugar or dust tops and bottoms with powdered sugar.


Monday, December 19, 2011

Kenyan-Mexican Fusion

This meal was inspired by a comment from my friend and Kenyan host sister Lilian. When I stayed with Lilian and her family we often had sukuma wiki, ugali, beans, and chapatis as a base for dinner. My family lived in a rural part of Western Kenya and the cooking was done in a cooking house behind the main house over an open fire.

This meal is meant to be eaten with your hands (specifically one hand). Sukuma wiki is typically collard greens cooked with an onion and tomato. Ugali is similar to polenta, but it is used to pick up the greens, beans, or meat served with the meal. Chapatis reminded me of tortillas that my mom makes to eat as burritos on a hot/dry pan; however, the chapatis were fried in oil or lard. On one occasion, I cooked for my host family and made refried beans with garlic and a chilli powder. I modified everything a little bit based on the ingredients that we had at home.

Sukuma wiki
1 bunch mustard greens (from CSA)
1 onion
2 cloves garlic (from CSA)
grapeseed oil

Chop onion and cut greens into strips. Heat oil in a pan and cook onions until translucent. Add greens and garlic and cook until greens are wilted and brightly colored.

I liked the mustard greens. Yum!

Ugali
2 c water
1 c corn flour (from CSA)
1 t salt
1 T butter

Heat water and salt until boiling. Slowly add in corn meal (or flour) stirring quickly to prevent (or remove) as many lumps as possible. Add in butter near the end.


I am quite out of practice and my ugali was very lumpy and didn't hold up well when picked up by hand, but tasted great when paired with the greens.


Chapatis
4 c flour mix of whole wheat and white
4 T butter
1 T baking powder
1 t salt
1 1/2 c water

Mix all ingredients together using hands or a pastry knife. Roll out into rounds chapatis.


Cook over medium heat and flip when bubbles start to appear. Can be cooked with oil or without on a griddle or cast iron pan.


My chapatis were not quite round even though I used my Kenyan chapati board and rolling pin. I could hear my Kenyan host mom in my ear reminding me to make them as round as possible. But they tasted great and held up for several days for a variety of toppings!


Beans
1 can garbanzo beans
2 cloves garlic (from CSA)
1/2 onion
2 t cumin
2 t chili powder
oil

Heat oil and cook onions until translucent. Add in beans, spices, and garlic. Cook until heated through.
The beans were a nice addition to the meal. I think especially with the more typical Mexican flavoring it was a nice compliment to the other parts of the meal.


Thursday, December 15, 2011

Karen's Roasted Beet Vishyssoise

On dreary fall days, I enjoy enjoy eating potato-leek soup. I often make mine with a milk base, but thought I'd try the dairy free version my friend Karen wrote about on her blog. It's a modified potato-leek (from our CSA) soup with roasted beets (from our CSA) and a very flavorful vegetable scrape broth.

She has wonderful pictures, recipe list, and step-by-step instructions on her blog.

I did make a couple of modifications to the recipe. First, I roasted both the beets and the potatoes in the oven. The beets were gorgeous when I cut into them; some were red and white stripped and others were yellow and white stripped.

I also did not make the pesto, but instead added ginger and garlic (from our CSA) directly to the soup in the last stages of cooking.

The beets were super sweet and so the soup has a very sweet taste. And because of the coloring of the beets the color is more pink-light brown than the vibrant red in the original on Karen's blog. The soup was also delicious with a little cheese sprinkled over the top.

Tuesday, December 13, 2011

Rutabaga Fries

The first time I cooked a rutabaga was last winter when they were included in our CSA bag. They are a cross between a turnip and cabbage, and I think taste like a mild Brussel sprout. Last year, I made a Waldorf salad with the rutabagas.

When our CSA share had two Rutabagas this week, I decided to make them into fries with a recipe suggested by our famers. I want to like rutabagas because they have a lot of Vitamin C and dietary fiber, and they have such a great name.

The recipe is fine and easy to make. However, honestly none of my family liked them very much. I haven't acquired a taste for rutabagas yet, and consequently, I don't think I would purposely seek them out. However, this is one of the reasons I enjoy getting a CSA share--as a challenge to eat foods that are not part of our normal repertoire. Next time we get rutabagas, I might try to make them into mashed potatoes to see if we like them more that way.
Rutabaga Fries

Rutabagas (from our CSA)
Salt
Olive oil
Water

Cut rutabagas into large fry shapes. Place in boiling water for 5 minutes. Drain. Coat with olive oil and salt. Bake 30 minutes in 400F oven until browned.


Sunday, December 11, 2011

More Butternut Squash

Several weeks ago we made butternut squash ravioli adapted from Vegetarian Cooking for Everyone. The original recipe calls for a brown butter sauce with pecans and sage; however, we were out of both so I used filberts and the other herbs. The ravioli and sauce were delicious, but it was quite a project to make the ravioli pasta. I still had butternut squash and filberts left from my thanksgiving pies, and wanted to try it again. This week, I didn't have the time or energy to make the pasta. I decided to use gyoza wrappers to make the ravioli; however, unfortunately, the ones we bought at the store were moldy when I opened the new package. I had a handful of lasagna noodles, mozzarella cheese, spinach, and mushroms at home, so I decided to make the butternut squash filling into a lasagna.
Butternut Squash Lasagna
12 lasagna noodles
large handfuls of spinach (from CSA)
5 mushrooms sliced
6 oz mozzarella cheese diced
Olive oil

I often make a tomato based lasagna without cooking the noodles first, but decided that because this time I was not going to use a sauce, I needed to cook the noodles first.
Sautéed chopped mushrooms and baby spinach with garlic in olive oil. Layer cooked lasagna noodles with butternut squash filling, spinach, mushrooms, and cheese. Add another layer of noodles and repeat toppings. Add one final layer of noodles, cover with cheese.
Add water to the bottom of the pan. Cover with tin foil and bake 350F for 30 minutes. (I neglected to cover the pan at first and the noodles on top got a little too crunchy.) When cooked through, top with brown butter sauce (this really finishes the pasta--it's not nearly as good without the flavors of the sauce).
Butternut Squash Filling
2 c butternut squash roasted (from CSA)
2 T butter
Salt and pepper to taste
1/2 c Parmesan cheese
1/2 c bread crumbs (I've tried this with just a toasted and food processed piece of bread and matzo meal--both work fine)

Mix all of the ingredients together in the food processor until very smooth.
Brown Butter Sauce
4-6 T butter
1 clove garlic
2 T dried parsley
2 t dried thyme
1/2 c chopped filberts (from Thistledown Farm)

Add all ingredients to skillet and cook until butter is melted

Wednesday, December 7, 2011

Cabbage Fritters

This is such a simple recipe which has become one of our favorite cabbage ideas. Our Open Oak CSA farmers suggested this recipe developed by one of their farm hands during the winter 2010 season. It's a super easy weeknight dinner.

5 eggs
1 1/4 c rye flour (from CSA)
cabbage cut into strips or shredded (by hand or in the food processor)--enough to be completely coated by eggs and rye flour
oil for cooking

Whisk eggs, flour, and cabbage together. Cook over medium heat on the stove top until browned on both sides. Serve plain or with yogurt, ketchup, or hot sauce.

Monday, December 5, 2011

Wheat berry breakfast


I had some cooked wheat berries left over from the chili that I recently made and turned it into breakfast!

I defrosted blue berries, which we had picked and frozen during the summer, and mixed in Nancy's Vanilla yogurt.

Simple, delicious, and very filling!

Saturday, December 3, 2011

Corn Flour Waffles

I love making breakfast on the weekends. This corn flour waffle recipe from The Joy of Cooking was given to us by our CSA farmers last year.

I like to have a variety of toppings for waffles too so that I can alternate between blueberry syrup, maple syrup, and yogurt. The blueberry syrup recipe from my mom is so simple to make and delicious. I use the leftovers with yogurt during the week. Our maple syrup comes from Funks Grove in Shirley, Illinois; we restock our supplies when we visit my brother and family in Illinois. Yum!


Corn Flour Waffles

4 T butter
1 1/2 c milk
3 eggs
1/2 c corn flour (from CSA)
1 1/4 c wheat flour
1 T baking powder
1 T sugar
1/2 t salt

Melt butter, cool, and mix in milk and eggs. Add in dry ingredients and mix well. Cook on waffle iron. Remove when golden brown.


Blueberry Syrup

1 1/2 c sugar
1/2 c water
1/4 t cinnamon
3 slices lemon or oranges
2 c blueberries (Willamette Valley)

Mix sugar, water, cinnamon, and lemon/orange in a pan. Heat until boiling, and boil 5-7 minutes stirring constantly. Turn down heat and add in blueberries. Continue to stir and simmer 5-6 minutes.


Tuesday, November 29, 2011

Rainy Day Chili and Cornbread Dinner

It was one of those days when I couldn't decide what to make for dinner, and we seemed to be missing key ingredients for everything I wanted to make. I did find 1 pound of ground beef in the freezer and several cans of beans in the cupboard, so I decided to make chili and cornbread. We were out of onions, but I thought that I could probably substitute onion powder if I increased the amount of real garlic.

I also found a package of wheat berries from our CSA in the freezer (they've been in a freezer for several months) and decided that these would make a nice addition to the chili.

I hadn't make chili yet in my new slow cooker, so this rainy fall day seemed like a good day to give it a try. My chili recipe originated from a college friend. Beer is the key ingredient. It's fun to see how different beers change the flavor of the final product. This time I used the last beer in the house, an Inverness IPA from Deschutes Brewing. To adapt it to the slow cooker, I tried an idea from Slow Cooker Revolution to make a panade of beef, bread, and milk. We did not have any white bread (as recommended in the recipe), so I used up the last of the heel of the sprouted grain bread and the last 1/3 c of milk in the house. I also used the cookbook suggestion and added 3 T of soy sauce to make a more "meaty" flavor.

Chili
olive oil
1 onion chopped (or tonight onion powder)
cumin to taste
chili powder to taste
oregano to taste
2 cloves garlic
2 cans beans (today 1 can black and 1 can kidney)
1lb ground beef
1 slice bread
1/3 c milk
1 bottle of beer
1 15 oz can of diced tomatoes
frozen or fresh corn (I completely forgot to add this today!)

Heat pan on the stove and saute onion with the spices until onions are soft. Transfer to the slow cooker. Add in beans, tomatoes, beer, soy sauce, and garlic. Mix milk, bread, and beef together in bowl. Cook on skillet with more cumin, chili powder, and salt until browned. Transfer to slow cooker. Cook on high for 3 hours. Serve with cheese and cooked wheat berries.

Wheat berries
2/3 c wheat berries (from CSA)
2 c water

Rinse wheat berries in water to remove extra husks, rocks, and dirt. Bring to a boil with the water. Simmer on low for 45 minutes. Drain extra water or let it sit to soak up more water.


The corn bread recipe is known in our house as Nana's Johnny Cake. I used up the last egg and had to use soy milk since I used the very last of the cow milk in the panade. The soy milk gave the corn bread a nice nutty flavor.

Nana's Johnny Cake
1 c corn meal or flour (from CSA)
1 c wheat flour
1 T baking powder
1/4 c sugar
1 egg
1/3 c oil
1 c soy milk.

Mix everything together. Bake 425F for 25 minutes in an oiled 8-inch pan. Serve with Willamette Valley honey or homemade strawberry jam (made from Willamette Valley strawberries).


Sunday, November 27, 2011

Cabbage Gratin

Our CSA bag had a beautiful head of cabbage. I wanted to try something new and found this cabbage gratin recipe in Vegetarian Cooking for Everyone by Deborah Madison. It is a perfect cookbook when I need an idea for a particular ingredient. I already had an open container of tomato paste, and after reading the cookbook information about gratins, decided I could substitute 1/4 c cream for 1/4 c more milk.

The recipe called for cutting the cabbage leaves into 2-inch squares. The recipe also called for buttering the dish and coating it with grated Parmesan cheese. I had shredded cheese, and it didn't stick to the side, but we had a nice layer of cheese on the bottom.

I didn't eat the gratin on the day I made it. In fact, I placed it in the refrigerator after assembling, and then I cooked it several hours later. Even after it was cooked, we didn't eat it for dinner, but I put it in the refrigerator. I liked it cold (actually better than reheated in the microwave). It reminded me of a vegan-gluten-free lasagna that a friend makes with cabbage leaves instead of pasta and avocado instead of cheese. I tried to eat the gratin as a main dish, but it just wasn't filling enough. However, it makes a nice and relatively simple side dish.


Cabbage Gratin
Butter and grated Parmesan for dish
1 1/2 pounds cabbage (from CSA)
1/3 c flour
1 1/4 c milk
2 T tomato paste
3 eggs
Salt and pepper
3 T dry parsley

Butter a gratin dish and coat the sides with cheese. Boil the cabbage uncovered in salted water for 5 minutes. Drain. Whisk the remaining ingredients together. Combine in the dish and bake 375F for 50 minutes. (I added about 20 minutes to this cooking time since I had took the dish directly from the refrigerator to the oven.)

Tuesday, November 22, 2011

Two Thanksgiving Pies in One Day

My favorite holiday pie has always been a filbert pie (aka hazelnut) recipe that my mom was given by a friend who grew filberts in the Willamette Valley. When I had my first Thanksgiving dinner with my husband's family, I made my family's favorite filbert pie. Every year since then, my extended family has said that I'm not allowed to attend Thanksgiving dinner unless I bring a filbert pie.

I also offered to bake a pumpkin pie this year. In October, I made a pumpkin pie with a pie pumpkin. This time I wanted to use the butternut squash from our Open Oak Farm CSA to see how the flavors compared. I used a sweet potato pie recipe from The Fannie Farmer Cookbook, which I chose for the simple reason that it used regular milk rather than condensed or evaporated. I thought the original recipe was a little bland, so this time I increased the amount of nutmeg and cinnamon and added in ginger and cloves too.

On Tuesday before Thanksgiving I set out to make both of these pies in one afternoon with help from my 4-year old and lots of breaks to take care of my 4-month old. We managed to get both made over a 4-hour time span!

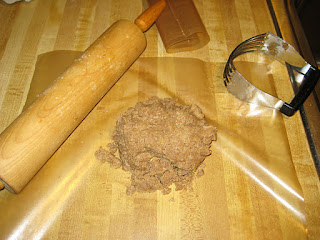
We started out making two 9-inch pie crusts with a simple salad oil crust recipe. This was the first time that I've tried to make this recipe completely with whole wheat flour. Sifting was essential, but the crust was very crumbly. The nice part about using the salad oil is that the crust is easy to put back together even if it crumbles.

Salad Oil Pie Crust
(makes 2 9-inch pie crusts)
3 c sifted flour (red wheat flour from our summer CSA)
1/2 t salt
3/4 c salad oil
6 T milk or water

Mix flour and salt. Add liquids and stir quickly with a fork or pastry cutter. Add few additional drops of liquid as needed.

Form dough into two balls and roll between sheets of wax paper. Transfer to pie dish.

After both pie crusts were finished, we began working on the fillings.


Filbert Pie
2 cups filberts toasted and coarsely chopped (from Thistledown Farm)
3 eggs
1/2 c brown sugar
1 c corn syrup
1/4 t salt
1 t vanilla
1/2 c melted butter

To toast filberts, spread shelled filberts in a single layer in a shallow pan. Toast at 275 F for 20 minutes. Use "skinned" or "unskinned." To remove skins, rub nuts between hands or with a rough cloth when cool. Store in an air tight container, freezer, or refrigerator. For the pie, chop coarsely and set aside.

Beat together eggs, sugar, syrup, salt and vanilla in a large bowl. Melt and slowly add butter to above mixture so as to not curdle the eggs. Stir in filberts. Pour mixture into a 9" pie shell.

Bake 375 F for 30-45 minutes until set in the center. Cool. Serve in very small servings because it is very rich.

And on to the squash pie.

Butternut Squash Pie
2 cups mashed cooked squash (Butternut from CSA)
2 eggs
1 1/4 c milk
3/4 c sugar
1/2 t salt
1 t cinnamon
1 t nutmeg
1/2 t ginger
1/2 t cloves
4 T butter melted

Preheat oven to 425F. Cook squash. I put the whole uncut butternut squash in the oven and cooked it for a little over an hour at 350F. After it cooled I scraped out the seeds into the compost and put the flesh into the refrigerator. It was a little chunky (unlike the pumpkin filling from a can), so I put the squash, milk, and eggs in my food processor until the mixture was smooth and frothy. Transfer to mixer and add in remaining ingredients. Pour into 9-inch pie pan.

Bake 10 min at 425F. Turn temperature down to 300F and bake for an additional 50 minutes or until a test knife comes out clean.


My helper really enjoyed licking the pumpkin pie beater. He proclaimed that it was, "Really, really good." I think the pies look nice too. I'm looking forward to testing them on Thursday!


Monday, November 21, 2011

First CSA Bag of the Season


Over the last decade, my husband and I have tried to eat more locally. We have frequented farmers' markets in Portland, Beaverton, Corvallis, and Eugene. We've grown vegetables in two different community gardens and at each of our homes. We've also joined four different Community Support Agriculture (CSA) farms.

We were fortunate to find and join the Open Oak Farm's winter 2010 CSA. It had the perfect mixture of staple vegetables and grains and new foods for us to try (and the best carrots I've ever eaten). We loved it so much that we joined again for Summer 2011 and are delighted that the Winter 2011 farm share has begun. This season we are splitting the vegetable share with our friends, who write a blog about the Fairmount Neighborhood Farmers Market. We are also splitting a winter grain and bean CSA from Lonesome Whistle Farm.

I've been having a great time exploring new recipes each week to use the items from my vegetable share, and am looking forward to writing about them here.

Our first CSA bag of the season arrived last week. I spent several days looking through recipes in my newest cookbook Slow Cooker Revolution from America's Test Kitchen to find the perfect inaugural recipe for both a new slow cooker and for the winter CSA season. It was a winner! This recipe is designed to serve 6-8 people. We had enough for two adults for several meals and froze the rest for another day.


Super-Veggie Beef Stew

3 T oil
3 onions chopped (from CSA)
1/4 c tomato paste
6 garlic cloves minced (from CSA)
1 T thyme
1/3 c flour
1 1/2-2 c chicken broth
1 1/2 c beef broth
8 oz mushrooms (recommends portobello caps, I used regular buttons) chopped
1/3 c soy sauce
2 bay leaves
4 lb cubed beef (We only had 1lb and it was perfectly fine)
2-3 medium potatoes cut into 1-inch chunks
4 carrots cut into 1-inch pieces
3 parsnips cut into 1-inch pieces (from CSA)
8 oz kale cut (from CSA)

Heat 2 T of oil in skillet over medium heat. Add onions, tomato paste, thyme and garlic and cook until onions are softened. Stir in flour and cook for 1 minute. Whisk in chicken broth, scraping up any browned bits and smoothing out lumps. Transfer to slow cooker.

Stir in beef broth, mushrooms, soy sauce, and bay leaves. Season beef with salt and pepper and nestle into slow cooker. Toss potatoes, carrots, and parsnips with oil, salt, and pepper and place into foil packet. Lay foil packet on top of stew (keeps vegetables from getting too mushy).

Cover and cook 9-11 hours on low or 5-7 hours on high.

Remove foil packet. Let stew settle for 5 minutes and remove fat. Discard bay leaves. Place kale into slow cooker and cook 20-30 minutes. (However, we just cooked it a bit with olive oil on the stove top and then added it to our individual bowls before eating.)

Carefully open foil packet (watch for steam) and pour vegetables and juices into the stew. Let it heat through and mix about 5 minutes before serving.