Saturday, April 5, 2014

Starter Day 5 Bubbles, Bubbles Everywhere

"Ew!"

That's how my 2 year old described the smell of the starter this morning.  It's pretty funky.

It had two distinct layers all throughout the day.  So I've been thinking all day about what's the top?  Is that the waste products of the bacteria and yeast?

Today, I read part of Peter Reinhart's book on baking with whole grains, and he mentions stirring a starter several times a day to get better results.  The big jars are easy to just give the mixture a swirl when I would walk through the kitchen.  Also several times today when I walked into the kitchen the dish towel was on the counter rather than on the jar.  I don't know if the carbon dioxide was building up and pushing it off, or if a cat or human kept removing it.


After feeding the starter, it is so bubbly.


Looks great, but it still smells pretty funky.


It's hard to think about throwing a cup of starter away a day, so I've also put some aside so we can have sourdough pancakes in the morning to see if it's ready for baking.

Friday, April 4, 2014

Day 4 First Feeding

Today is the first day to feed the starter by moving it to a fresh, clean container and adding more flour and water.  It's amazing how after just three days, how it has truly become alive as Peter Reinhart describes in this TED talk.

There was a crusty layer on the top and below was a soft gooey layer the consistency of pancake batter.  We took a small amount of the original starter from the bowl including some from both layers.


To that I added water.


My children took turns adding flour as a 50/50 white/wheat mix and we stirred it together.


Darth Vader also participated in starter making.


Even an hour after feeding, the newly fed starter had a completely different smell.  It smells sour Elmer's Glue.  The sour smell is a new note that we hadn't had before.  Does that mean I have more bacteria than yeast growing?


Thursday, April 3, 2014

Day 3, Cat Paws, and a New Book

Oh fun!  Day three is definitely different than day two!  The starter has more bubbles, seems to have a crusty layer over the top, and is even darker brown in color.  It smells like smoked sausage!

I'm worried that I don't have a warm enough place in the house.  Chad Robertson recommends 80 degrees, but my house is closer to 64 during the day.  I've been moving it around to warm places (heat vent, on top of the dishwasher), but I don't know if this make sense for the long-term.

This is what the starter looked like tonight (48 hours).


This is what it looked like after the cat stepped into the bowl.  It so interesting how below the crusty exterior the color of the starter looks like it did on the first evening.


So now, there's a new cloth covering the top.


Tomorrow is the big moving day to the jar and I get to feed part of it.  I have a whole day to figure how I will measure 75g of starter without a scale...

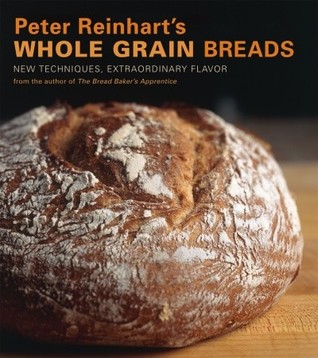
Today I purchased this beautiful new bread book too.  The photos and descriptions are fantastic.  I might need to try a challenge like my friend did with the Bread Bakers Apprentice to bake every bread in here.  It would definitely expand my bread baking skills!


Wednesday, April 2, 2014

Starter Day 2

Nothing too exciting. The starter is a little more gray in color, and I can see more bubbles than last night.  It still smells the same as last night and reminds me of the making paper mache covered balloons with a flour/water mix.  I've put the towel back over the bowl and put it back in the corner.


Tuesday, April 1, 2014

Bread Starter Day 1

This term, I am teaching a course entitled "Bread 101" with four colleagues including the authors of the Fairmount Neighborhood Farmers Market Blog and Culinaria Eugenius.  As part of the course, students will be asked to use Chad Robertson's Tartine Book 3 recipe and instructions for beginning a sourdough starter much like Michael Pollan did in his book Cooked.  We passed out 1/2 gallon jars to each of the students today, and they will get their instructions in two days for beginning and tracking their starter.  I was too excited to wait.

The Tartine 3 recipe calls for measuring water and flour in by mass, but I don't have a kitchen scale.  So I used an online cooking conversion chart to estimate volume. My 2 year old and I added some water.


Next came the flour as a white/wheat mix.  Cow jammies and sunglasses are essential to the process.


We took turns stirring it together.


Once it was all nicely mixed,


 we covered the bowl and put it on the counter until tomorrow.


Grow little starter, grow!

Monday, August 19, 2013

Fig and Honey Galette

Nearly all of our fruit has come from Thistledown Farms this summer.  We went to get one more flat of blueberries to freeze for the winter, and I couldn't pass up the container of fresh figs.  When ripe in the summer they are such an amazing sweet treat.

To try something new, I made a galette recipe from Deborah Madison Vegetarian Cooking for Everyone.  This was my first time to bake with figs and first time to make a galette.  I like this forgiving type of dough that doesn't have to look perfect to have a delicate and delicious taste.  I see more galettes in my cookbook, and am looking forward to more experimenting!

Fig and Honey Galette
Galette Dough
2 c flour (Soft White Wheat from Lonesome Whistle Farm)
1/2 t salt
1 T sugar
12 T butter old
1/2 c ice water

Mix flour, salt, sugar and butter in mixer.


Remove and sprinkle in water until dough can be formed into a ball.   Then roll into a round shape approximately a foot in diameter and place on a baking sheet.


Fig Filling
3 T butter
1 pint of figs (Thistledown Farm)
2 T honey
1/8 t cloves
1/2 t cinnamon
1 T sugar

Paint dough with 1T melted butter.  Slice figs in half lengthwise and lay on the galette dough.  Mix honey, 1T butter, cloves and cinnamon and microwave until butter is melted.  Pour over figs.  Fold up edges of the dough.  Melt last tablespoon of butter and add sugar and brush over the dough. Bake 35 minutes @ 400F oven.


Sunday, August 18, 2013

Kale Chips

The little bags of kale chips at the store are delicious, but oh so spendy!  Making it ourselves is so much nicer especially since my daughter and I can eat nearly an entire bunch of kale in one afternoon.  She calls it seaweed, and in texture it can be similar to the seaweed snacks we sometimes buy.  I've found several recipes online, but many of them over cook  the kale causing it to be brown and bitter.  This recipe seems to work for us and our oven. The baking time also seems to depend on the moisture in the kale related to how fresh it is from the farm--grocery store kale cooks faster than that from the farm stand or CSA.

We've also found that we need to store the cooked chips  in the fridge so they don't go bad, and we can pop them back in to the oven for just a few minutes to regain the crispy texture.

Kale chips
1 bunch kale (from Thistledown Farm)
Olive oil or grape seed oil
Salt

Tear kale into 2-4inch pieces.  Sprinkle with oil and salt.  Bake 250 F for 12-15 minutes.  Check and turn around minute 10 to check for crispness.


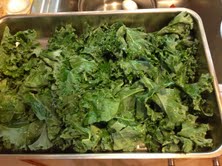
Ready for the oven.
Crispy and ready to eat!